STAINLESS STEEL ALLOYS
Many materials fall into the category of stainless steel alloys, including austenitic, martensitic, duplex, ferritic and other types of stainless steels. These are most easily NDT tested in both tubular form or in bar stock form (long constant cross section).
- Tubulars can be seamless or welded tubes. Further refinement can be drawn and ground surface. Sizes can range from those for hypodermic needles to >500mm diameter pipes for oil and gas transmission.
- Bars can be as rolled, peeled or drawn and surface improved.
The two primary methods of testing / inspection are Eddy Current and Ultrasonic.
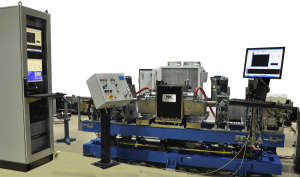
MAC Echomac® Ultrasonic system for testing welded stainless steel tube for heat exchanger applications
Eddy Current Method – Tubes
Many producers of tube make products in house from various material grades. Many of the grades are called “Stainless”. These grades are often known or thought to be austenitic and therefore non-magnetic. Usually, this type of product will be tested using a magnetic saturation bias field which is applied to the normal eddy current type test coil. This is done because there is some part of the production process that causes local hardening of the material which creates some ferromagnetism. The ferromagnetism results in “noise” which compromises the eddy current test results. By saturating the material, permeability variations are evened out, making the material appear to the test system as though it is non-magnetic, which allows the normal eddy current test to be successfully applied
Eddy Current Method – Bars
Many bars will have some surface seams that need to be detected. Seams are normally longitudinal in nature and the spinning EC probe method is the best technique to detect surface seams. Seams on the order of 0.15mm (0.006”) can be detected in as-drawn material. If the bars are surface improved, it is possible to detect more shallow seams because of the higher quality surface. Some seams and cracks that are present are not detected with surface eddy current testing if the bar surface is in compression due to the bar processing method.
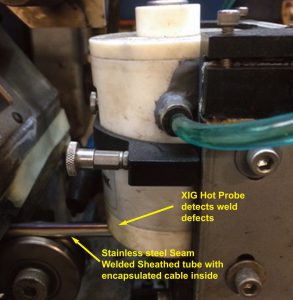
Water cooled eddy current test probe, mounted right after the welding operation to inspect for weld defects in stainless steel seam welded tube
Ultrasonic Method – Tubes
Many tube end use applications mandate that the tubes be ultrasonic tested. Heavy wall tubes can benefit from ultrasonic testing because the heavy wall configuration attenuates the capability of an Eddy Current test to detect conditions on the inside surface of the tube.
Ultrasonic Method – Bars
Solid material can have internal discontinuities and inclusions from a variety of sources. The Ultrasonic method can detect small internal reflectors equivalent to any quality level of AMS-STD-2154. The material processing method and material quality strongly determines the possible inspection level.
Stainless material with no magnetic properties can sometimes benefit from being tested with the shear ultrasonic method to detect shallow seams or subsurface defects or any seam depth for that matter.
Combined Test Systems
MAC supplies a wide variety of NDT equipment and complete test systems to handle the increasingly higher quality demands of the many quality driven world industries
Many systems are provided as a combination eddy current and ultrasonic test system to take advantage of the strengths of the different testing technologies. MAC is uniquely positioned to supply both technologies in a cost effective configuration that minimizes size changeover time.
There are many possible test machine configurations. These can be linear product feed with encircling eddy current coil and/or rotary transducer (spinning transducers and spinning EC probes), helical feed spin the tube or bar or overhead gantry configuration (fixed position spinning product).
A Multicollector device can be supplied to collect all data from multiple test stations in an organized fashion to be stored in a query type database for intelligent storage and retrieval
MULTIMAC®
Eddy Current Instrument for Testing Tube, Bar, & Wire
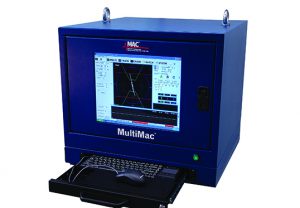
- Operates with encircling, sector, or rotary test sensors
- Up to eight test channels, null or absolute, can be used in any combination.
- Detect short surface and some subsurface defects in tube, bar, and wire.
- Inspect welded tube for short ID or OD defects in the weld zone.
ECHOMAC® FD6
For Flaw Detection, Thickness & Dimensional Measurement in Tube & Bar
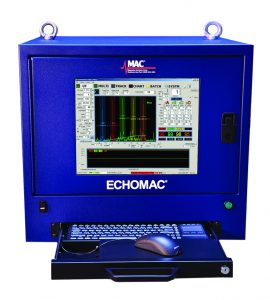
- Versatile Ultrasonic tester with superior performance and versatile, intuitive operation.
- For full inspection of tubes, pipes and bars, plate and weld.
- Operate on or off line
- Upgrade and/or replace older ultrasonic testers
- Use with rotary, spin-the-tube, squirter and bubbler installations.
EDDY CURRENT TECHNOLOGY
MAC’s® Eddy Current Testing (ECT) systems incorporate computer-based test instruments and test coils that use two ECT coil technologies: encircling and sector coils, and spinning or rotary probe coils.
- Encircling and sector Eddy Current coil tests perform in this manner:
- The product is passed through or adjacent to an electrical test coil, which
has been excited by an alternating current. - This induces a flow of eddy currents around the test material or in the
case of a sector coil, in the area under the coil. - Short, intermittent anomalies or flaws cause a variation in the eddy
current pattern, which the instrument detects.
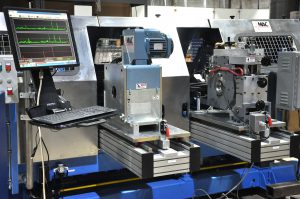
Eddy Current System including rotary probe tester and encircling coil unit
ULTRASONIC TECHNOLOGY
High-speed Ultrasonic (UT) Systems enable a full volumetric examination of materials and are designed to detect surface, subsurface, internal and dimensional flaws.
This type of testing utilizes high-frequency sound waves that are transmitted throughout the material being tested in order to conduct a thorough inspection.
- Ultrasonic inspection can be used to detect surface flaws, such as cracks, seams, and internal flaws such as voids or inclusions of foreign material. It’s also used to measure wall thickness in tubes and diameters of bars.
- An ultrasonic wave is a mechanical vibration or pressure wave similar to audible sound, but with a much higher vibration frequency. For NDT purposes, the range is usually from 1MHz to 30MHz or higher.
- Depending on the test requirements, these waves can be highly directional and focused on a small spot or thin line, or limited to a very short duration.
- Two methods of UT are used for flaw detection – Shear and Compression Wave.
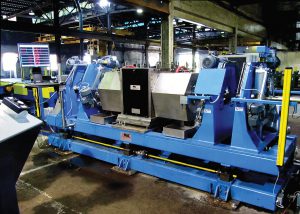
Echomac® 150mm Rotary System for testing bar

