ECHOMAC® PA BAR TESTER
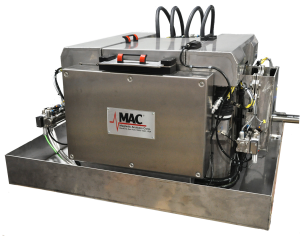
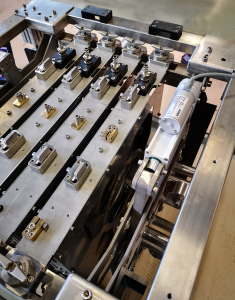
Magnetic Analysis Corp.’s new Echomac® PA BT phased array system for testing bar allows producers to handle a much larger range of diameters in one installation. Available in 3 models to test 10 – 75mm diameter (small model); 20 – 130mm (medium model) or 50 – 254mm (large model), these testers use MAC’s new cassette system where size changes can be implemented efficiently and quickly in under 5 minutes. The transducer cassettes, selected to meet the specific size ranges the customer will be testing, are housed in a waterbox assembly which serves as the immersion tank. Mechanical positioning knobs, mounted on the cassettes, allow optimizing alignment of the test probe to the bar. A floating head feature allows the system to automatically adapt for small variations in straightness while keeping the probes normal to the surface of the bar. Two Triple Guide Roll self-centering units (one pair for inlet and outlet side of frame) are incorporated in the waterbox.

Echomac® PA Bar Tester
The Echomac® PA BT provides 100% inspection of round bars for core and surface defects, at speeds up to 2 m/sec, depending on the specific application. Phased array technology offers the ability to focus, steer and scan an ultrasonic beam without any mechanical movement. The arrays coupled with the phasing electronics allow the beam to be rotated around the circumference of the bars providing full volumetric coverage. The rotation of the sound beam is generated by phasing (time delaying) the activation of the individual elements of the array. The electronics are located at the immersion tank. This design ensures the shortest array cable lengths and allows the signals to be digitized before they are transmitted to the evaluation electronics, thereby optimizing the signals and resulting in superior detection of defects and fewer false indications.

PA Bar Tester Transducer Holder
with Cassettes
The system includes an operator friendly graphic interface and once the initial settings are entered and stored, the setup is recalled and all operation and testing is automatic. A virtually infinite number of setups can be saved. No additional manual operations are required, aside from changing a front and rear bushing for size changes. This computer driven test operation allows the use of operators without high levels of technical NDT training and results in improved inspection reliability and calibration repeatability.
A calibration mechanism for calibrating the system with reference standards, in an off-line position, is available as an option.
