TUBE ENDS
All nondestructive test (NDT) methods have some limitation in regard to testing to the very end of a tube. These “untested ends” must be cut off, resulting in a substantial loss of product and revenue. To avoid this loss, a manufacturer needs to develop a method to test these ends to meet the tube integrity requirement.
Some industries require that the end be tested to a higher level of integrity because it is being expanded, threaded or welded in the field, and end integrity is critical to the tube performance. MAC’s Echomac® UT End Tester offers a solution to this challenge.
This innovative solution for inspecting tube ends:
- Fulfills API 5CT & 5L.
- Detects ID & OD longitudinal and transverse notches down to 5% of the tube wall.
- Detects lamination 6.2mm FBH.
- Measures wall thickness.
- Offers precision Automated Pitch Control.
- Features a unique end plug cone that can follow unstraight tube ends.

How it works:
The Echomac® UT End Tester consists of two independent, identical test stations designed to inspect the untested portion of a tube end. Generally, this portion would range between 250 and 500mm from the tube end, depending on the application.
The tube is fed to one of these test stations where a tracking cone is inserted into the tube end, the tube is spun, and the end is inspected. The end plug cone tracks with the rotating tube and keeps the couplant out of the tube interior to prevent interference with the test signals.
The tube is then transferred to the second test station where the other end is scanned. The stations each include Echomac® ultrasonic (UT) instrumentation with transducer elements, housed in a transducer box which contains the water couplant and follows the tube surface, as it is being spun.
MAC has recently developed several tube inspection test systems that utilize different technologies for end testing.
One system, supplied to test large diameter stainless steel welded pipe 3.5 – 6.5 meters long, uses eddy current test coils which scan the tube lengthwise and are able to test to within 40mm of the pipe end.
In another recent system, flux leakage technology is used and the end testers are designed to detect longitudinal defects located up to 300mm from the tube ends.
Contact MAC for more information on these and other ways of handling testing to the ends of a tube.
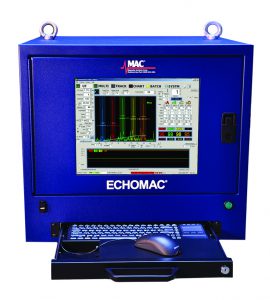
ECHOMAC® FD6
For Flaw Detection, Thickness & Dimensional Measurement
in Tube & Bar
- Versatile Ultrasonic tester with superior performance and versatile, intuitive operation.
- For full inspection of tubes, pipes and bars, plate and weld.
- Operate on or off line
- Upgrade and/or replace older ultrasonic testers
- Use with rotary, spin-the-tube, squirter and bubbler installations.

ULTRASONIC TECHNOLOGY IN NDT
High-speed Ultrasonic (UT) Systems enable a full volumetric examination of materials and are designed to detect surface, subsurface, internal and dimensional flaws.
This type of testing utilizes high-frequency sound waves that are transmitted throughout the material being tested in order to conduct a thorough inspection.
- Ultrasonic inspection can be used to detect surface flaws, such as cracks, seams, and internal flaws such as voids or inclusions of foreign material. It’s also used to measure wall thickness in tubes and diameters of bars.
- An ultrasonic wave is a mechanical vibration or pressure wave similar to audible sound, but with a much higher vibration frequency. For NDT purposes, the range is usually from 1MHz to 30MHz or higher.
- Depending on the test requirements, these waves can be highly directional and focused on a small spot or thin line, or limited to a very short duration.
- Two methods of UT are used for flaw detection – Shear and Compression Wave.

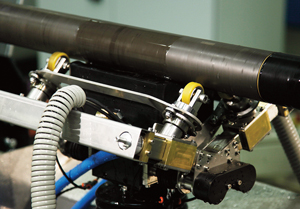
APC Transducer Carrier

