WELD PROFILER
MAC’s Weld Zone Profiler is designed to monitor the weld quality of a tube by depicting the “profile” of the completed weld. Unacceptable weld profiles can indicate potential problems associated with irregularities in the scarfing and trimming process, a reduction in the weld size, and other anomalies which compromise the performance of a welded tube.
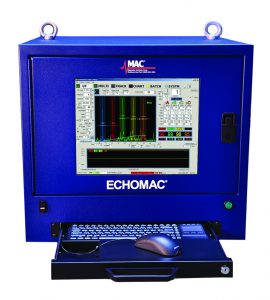
This system incorporates our Echomac® FD electronics, with custom Echohunter® software for profile monitoring, ultrasonic test head mechanics, pillar and guide unit, 1 transducer providing 1 channel for wall/weld profile, downstream video monitoring, and an optional off-line calibration station.
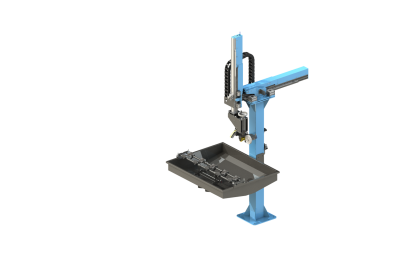
- Pillar and gantry unit for support and stabililzation of test head.
- Special ride shoe to withstand harsh environments.
- Couplant for UT using bubbler technique.
- Custom designed test head scans the weld zone.
- A-Scan display of profile waveform and strip chart profile view, tracking and recording.

Ultrasonic Weld Zone Profiler Unit with support gantry and test head
A robust pillar and gantry unit supports and stabilizes the transducer test head and positions it onto the weld line for mill testing, and off line for easy calibration of a new tube size. MAC’s custom-designed test head rides on the tube surface, oscillating back and forth across the weld area while performing the scan.
The transducer is mounted in a special ride shoe which is designed to withstand especially harsh environments and the sound beam is coupled to the tube through a short water column using the bubbler technique.
The Echomac® electronics and Echohunter software integrates a UT setup parameter panel, A-Scan display of profile waveform and strip chart profile view, tracking and recording all into a single program for ease of use. Production data can be saved and/or transferred to disc or Ethernet. Printing of setups, wave forms, or strip chart recordings can be done with the push of a button. Summary reports are given at the end of a production run containing the total number of pieces, length tested, number of rejects, time and date stamp, along with material and customer information.
Trained and experienced MAC engineers can provide you with more information on weld profile testing.
ECHOMAC® FD6
For Flaw Detection, Thickness & Dimensional Measurement in Tube & Bar
- Versatile Ultrasonic tester with superior performance and versatile, intuitive operation.
- For full inspection of tubes, pipes and bars, plate and weld.
- Operate on or off line.
- Upgrade and/or replace older ultrasonic testers.
- Use with rotary, spin-the-tube, squirter and bubbler installations.

ULTRASONIC TECHNOLOGY IN NDT
High-speed Ultrasonic (UT) Systems enable a full volumetric examination of materials and are designed to detect surface, subsurface, internal and dimensional flaws.
This type of testing utilizes high-frequency sound waves that are transmitted throughout the material being tested in order to conduct a thorough inspection.
- Ultrasonic inspection can be used to detect surface flaws, such as cracks, seams, and internal flaws such as voids or inclusions of foreign material. It’s also used to measure wall thickness in tubes and diameters of bars.
- An ultrasonic wave is a mechanical vibration or pressure wave similar to audible sound, but with a much higher vibration frequency. For NDT purposes, the range is usually from 1MHz to 30MHz or higher.
- Depending on the test requirements, these waves can be highly directional and focused on a small spot or thin line, or limited to a very short duration.
- Two methods of UT are used for flaw detection – Shear and Compression Wave.

