WELDED TUBE
There are many welding processes and many tubing configurations and sizes. MAC has extensive experience testing tubes and pipes and we have a large base of testing equipment lines being used to meet the many different ASTM, API, EN, ISO and other industry quality standards and or customer driven quality requirements.
- The Eddy Current method is the most versatile and cost effective method for testing metallic tubes. Eddy Current technology can be operated over the widest speed range and can in many applications be installed on the production line without any restriction from the production rate. This is the preferred method to detect small, short, incomplete welds, and some subsurface and Inside Diameter conditions in carbon steel or stainless or nonferrous tube.
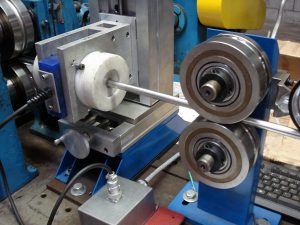
Eddy Current Encircling Coil unit Inspecting SS Welded Tube
- For some critical full body tests, including the detection of long, continuous defects such as incomplete seam welds in tube, and inclusions, voids or cavities, Ultrasonic test systems are recommended.
- Flux Leakage systems are also available to accurately detect longitudinal and transverse surface defects on the OD and ID of heavy-wall magnetic tubing.
- Since each testing technology has inherent capabilities and limitations, the optimum test solution for welded tube could be a combined system that utilizes both Eddy Current and Ultrasonic test instruments or other combinations to fit the needed task.
- The point at which the test is applied in the manufacturing cycle also influences the choice of method and apparatus. This might range from tests limited to the heat-affected zone on the weld mill, which could include an in-line anneal, to full body inspection of cut lengths after drawing and annealing or other heat treating.
- Each welding process has its own unique set of testing challenges. For example, incomplete ID weld defects are a common concern in TIG welding. Very short pinholes, and long continuous ID defects such as incomplete or mis-match welds, are typically associated with laser welding.
- Trained and experienced MAC people can help you to determine which test method should be used.
MULTIMAC®
Eddy Current Instrument for Testing Tube, Bar & Wire
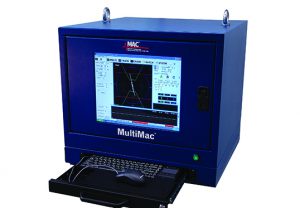
- Operates with encircling, sector, or rotary test sensors.
- Up to eight test channels, null or absolute, can be used in any combination.
- Detect short surface and some subsurface defects in tube, bar, and wire.
- Inspect welded tube for short ID or OD defects in the weld zone.
ECHOMAC® FD6
For Flaw Detection, Thickness & Dimensional Measurement in Tube & Bar.
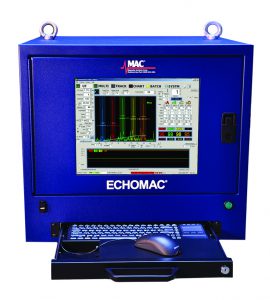
- Versatile Ultrasonic tester with superior performance and versatile, intuitive operation.
- For full inspection of tubes, pipes and bars, plate and weld.
- Operate on or off line.
- Upgrade and/or replace older ultrasonic testers.
- Use with rotary, spin-the-tube, squirter and bubbler installations.
ROTOFLUX®
The Best Technology to Detect ID/OD Defects in Heavy Wall Magnetic Tubular Products
- Detect longitudinal and transverse defects in heavy wall carbon steel to comply with required standards for OCTG pipe.
- Offers 24 separate channels for longitudinal (LRFX) and 48 channels for transverse (TRFX) defect detection.
- Using both rotary types together ensures detection of longitudinally or transversely oriented discontinuities such as seams, cracks, holes, pits, scabs, slivers, laps, roll-ins, and weldline defects.
- Differentiates between OD and ID defects.
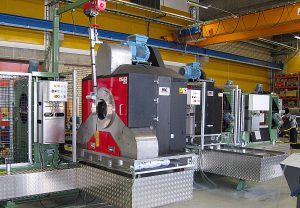
Transverse Rotoflux® Rotary, at left, and Longitudinal Rotoflux® at right testing OCTG pipe for transverse and longitudinal defects.
EDDY CURRENT TECHNOLOGY IN NDT
MAC’s® Eddy Current Testing (ECT) systems incorporate computer-based test instruments and test coils that use two ECT coil technologies: encircling and sector coils, and spinning or rotary probe coils
- Encircling and sector Eddy Current coil tests perform in this manner.
- The product is passed through or adjacent to an electrical test coil, which has been excited by an alternating current.
- This induces a flow of eddy currents around the test material or in the case of a sector coil, in the area under the coil.
- Short, intermittent anomalies or flaws cause a variation in the eddy current pattern, which the instrument detects
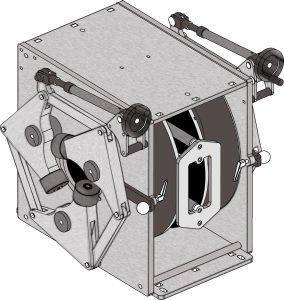
Series 65 Coil Platform
ULTRASONIC TECHNOLOGY IN NDT
High-speed Ultrasonic (UT) Systems enable a full volumetric examination of materials and are designed to detect surface, subsurface, internal and dimensional flaws.
- Ultrasonic inspection can be used to detect surface flaws, such as cracks, seams, and internal flaws such as voids or inclusions of foreign material. It’s also used to measure wall thickness in tubes and diameters of bars.
- An ultrasonic wave is a mechanical vibration or pressure wave similar to audible sound, but with a much higher vibration frequency. For NDT purposes, the range is usually from 1MHz to 30MHz or higher.
- Depending on the test requirements, these waves can be highly directional and focused on a small spot or thin line, or limited to a very short duration.
- Two methods of UT are used for flaw detection – Shear and Compression Wave.
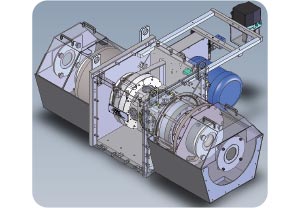
Echomac® Rotary Drawing
MAGNETIC FLUX LEAKAGE TECHNOLOGY IN NDT
Magnetic Flux Leakage (MFL) nondestructive test systems accurately detect defects in heavy-wall magnetic tubing, including oil country tubular goods (OCTG).
These electromagnetic test methods are also used to inspect high-permeability ferromagnetic metals such as carbon steel bar, plate, wire rope and parts. The method can also be used to detect ferritic inclusions in non-ferritic material.
- Ultrasonic inspection can be used to detect surface flaws, such as cracks, seams, and internal flaws such as voids or inclusions of foreign material. It’s also used to measure wall thickness in tubes and diameters of bars.
- An ultrasonic wave is a mechanical vibration or pressure wave similar to audible sound, but with a much higher vibration frequency. For NDT purposes, the range is usually from 1MHz to 30MHz or higher.
- Depending on the test requirements, these waves can be highly directional and focused on a small spot or thin line, or limited to a very short duration.
- Two methods of UT are used for flaw detection – Shear and Compression Wave.

Transverse & Longitudinal Rotoflux® 500mm Multi-Channel System

